A-Frame Trailer Toolbox Fitment Guide: How to Measure Before You Buy
When buyers shop for an A-frame trailer toolbox, many of them start in the wrong place. They compare product width, check a rough photo, and assume that if the toolbox looks close enough to the tongue layout, it will probably fit. That approach causes expensive mistakes.
A trailer tongue box is not just a front-mounted storage box. It is a component that has to share space with the coupler, trailer jack, safety chains, wiring, battery trays, propane mounts, and the opening path of its own lid. In other words, fitment is not about whether the box can physically sit on the frame. It is about whether the box can sit there and still allow the trailer to function properly.

That is why measuring before buying matters. A good trailer tongue box fitment process protects you from clearance issues, access problems, weight distribution mistakes, and installation frustration. The right box should improve front-end workflow, not overcrowd it.
Why A-frame toolbox fitment is more complicated than it looks

An A-frame trailer creates a naturally appealing place for storage. The triangular tongue area is already part of the operator’s main working zone, which makes it ideal for hitch accessories, gloves, straps, chocks, locks, small hand tools, and other towing essentials. That is why the A-frame trailer toolbox remains one of the most practical storage solutions for utility trailers, cargo trailers, travel trailers, and equipment trailers.
But the same geometry that makes the tongue useful also makes it unforgiving.
The A-frame narrows toward the coupler. The available width changes as you move forward or backward. The jack may sit in the center, slightly behind center, or on one side. Chains may need space to hang and move freely. Electrical plugs and breakaway cables may require direct access. If the lid opens upward, the opening arc needs room from the trailer front wall, nearby hardware, and the operator’s hand position.
That is why trailer toolbox measurements should never be reduced to one number. Real fitment requires you to measure the tongue as a working area, not as a flat surface.
Start with the trailer’s usable mounting zone

Before measuring a box, measure the actual mounting zone on the trailer.
This means identifying the part of the A-frame where a toolbox could realistically be installed without interfering with towing operations, maintenance access, or safe equipment movement. Buyers often confuse empty-looking space with usable mounting space. The two are not the same.
For a reliable toolbox for A-frame trailer fitment check, start by defining the mounting zone through four limits:
- the rear limit, where the box would begin to interfere with the trailer body, front wall, or nearby mounted equipment
- the front limit, where the box would crowd the coupler or reduce access to hitching components
- the side limits, where the frame rails angle inward
- the vertical limit, where lid opening, jack movement, and accessory clearance become restricted
Once those limits are clear, you are no longer guessing. You are measuring the real operating envelope of the future trailer front storage box.
Measure the inside and outside width of the A-frame
The first essential dimension in any A-frame toolbox sizing process is width. But width must be measured in context.
Because the frame rails angle inward, you should measure both the inside width and the outside width of the tongue at the point where the toolbox will sit. A box may match the outside width and still fail because its base design, mounting feet, or bottom profile conflicts with the inside frame geometry. On the other hand, a box that looks narrow enough in a product photo may still overhang awkwardly or leave poor mounting support if the frame spread is wider than expected.
To avoid that, take width measurements at the exact location where the front edge and rear edge of the box would sit. Do not rely on a single midpoint measurement. The A-frame changes shape over distance, and that shape change determines whether a utility trailer tongue box will sit cleanly or fight the frame layout.
This is also the point where many universal-fit claims begin to break down. A box may be marketed as suitable for A-frame use, but not every trailer uses the same frame angle, spacing, or mounting pattern.
Measure usable length, not just open space
The next major mistake buyers make is measuring the longest visible section of the tongue and assuming that is their maximum box length.
Usable length is not the same as visual length.
To calculate usable length for a trailer tongue box fitment decision, measure from the first safe rear position of the box to the last safe front position that still leaves proper coupler access and functional front-end clearance. This measurement should reflect the box footprint, not just the air above the frame.
A longer box may seem attractive because it increases storage volume, but on many trailers it also pushes too close to the jack, chains, coupler latch, or front turning area. The right result is not the biggest box that can be forced onto the tongue. It is the biggest box that still preserves access and workflow.
In practice, a well-fitted box often outperforms an oversized one because it allows the operator to move naturally during hookup, unhooking, and routine inspection.
Check lid opening clearance before you look at storage capacity
This is one of the most overlooked parts of how to measure for trailer tongue box selection.
Buyers often verify that the box body can fit, but forget that the lid needs its own clearance envelope. A lid that cannot fully open is not a small inconvenience. It directly reduces usable storage, slows down access, and can create hand clearance problems every time the box is used.
When checking lid opening clearance, ask these questions:
Will the lid hit the trailer front wall?
Will the lid opening path be blocked by a jack, battery tray, propane mount, or bracket?
Will the operator have enough room to stand and reach into the box comfortably?
Will the open lid interfere with the tow vehicle in a hitched position?
A box with strong exterior dimensions but poor lid clearance is a bad fit in real use. Good trailer toolbox measurements always account for the full operating motion of the product, not just the closed dimensions.
Measure around the trailer jack, not just beside it
On many trailers, the jack is the single most important fitment obstacle.
A centered jack, side-wind jack, top-wind jack, or powered jack can change the measurement strategy significantly. Some buyers only measure whether the box can sit next to the jack body, but the better method is to measure around the jack’s full operating zone.
That means accounting for:
- the jack tube location
- crank handle swing or motor housing clearance
- access to the jack from a normal working position
- vertical drop leg movement if applicable
- any U-bolts, brackets, or hardware mounted nearby
A box that leaves only static clearance may still be the wrong choice if the handle cannot rotate freely or if the operator has to reach at an awkward angle every time the trailer is raised or lowered. This is especially important in front-end layouts where the trailer jack and toolbox clearance relationship defines day-to-day usability.
A good trailer tongue toolbox guide should always treat the jack as an active component, not a fixed obstacle.
Account for coupler access and safety-chain movement

The front section of a trailer is not a storage-only zone. It is a connection zone.
The coupler must remain easy to inspect, latch, unlock, and service. Safety chains need enough movement to hang correctly and route cleanly. The wiring plug and breakaway cable should stay visible and easy to reach. If a toolbox blocks direct hand access to these components, it may fit physically while degrading operational safety.
This is why how to measure A-frame trailer for toolbox fitment should always include access checks, not just hard dimensions.
Stand in the position you would normally use when hitching the trailer. Then imagine the box installed. Can you still reach the coupler latch naturally? Can you cross or route chains without the box crowding the area? Can you plug in wiring without scraping your knuckles or rerouting the harness awkwardly?
A good fit leaves the connection zone functional. A bad fit turns routine hookup into a cramped workaround.
Check for interference from batteries, propane mounts, and front accessories
Many A-frame setups are more crowded than they appear in listing photos.
Travel trailers and some enclosed trailers may already use the front area for battery trays, LP tanks, mounting plates, spare tire supports, generator brackets, or custom accessories. Even utility trailers may have aftermarket items installed near the tongue that were not part of the original design.
This is where many trailer front storage box purchases go wrong. The buyer measures the frame rails but ignores what occupies the surrounding space above, behind, or in front of the box location.
For proper A-frame trailer toolbox fitment, check three-dimensional interference:
- side-to-side interference from tanks, brackets, or accessory trays
- rear interference from the trailer body or front wall
- upper interference from mounted equipment and lid arc
- front interference from coupler hardware and turning space
This step is what separates simple measuring from true fitment planning.
Do not ignore tongue weight and load logic
Fitment is not only geometric. It is functional and mechanical.
A front-mounted toolbox adds weight to the tongue area. That weight may be modest when the box is empty, but once loaded with chains, locks, tools, hitch hardware, and maintenance supplies, the real load can become meaningful. Buyers who measure fit but ignore loading logic may end up with a box that fits physically but pushes the front-end storage strategy in the wrong direction.
This does not mean an A-frame trailer toolbox is a poor choice. It means the box should be sized according to what it is supposed to store. A compact box holding high-frequency towing essentials often performs better than a large box filled with heavy, low-frequency gear that would be better stored elsewhere.
The right trailer storage box fitment decision balances access with weight responsibility. Front storage should support towing workflow, not become a dumping ground for everything metal and heavy.
A practical measuring sequence before you buy

The best way to reduce fitment mistakes is to follow the same sequence every time.
Step 1: Define the real mounting area
Identify where the box could sit without blocking the coupler, jack, chains, or trailer body.
Step 2: Measure width at more than one point
Measure the A-frame where the front and rear of the box footprint would rest, not just at the center.
Step 3: Measure usable length
Measure the safe footprint zone, not the longest visible open span.
Step 4: Check vertical and lid clearance
Make sure the lid can open fully and the user can access the inside comfortably.
Step 5: Test jack movement and hand clearance
Confirm that the jack handle, motor housing, and operator access still work normally.
Step 6: Check coupler and chain access
Ensure the connection zone stays functional after installation.
Step 7: Review surrounding accessories
Look for battery trays, propane brackets, wiring mounts, and aftermarket hardware that may cause interference.
Step 8: Match box size to storage purpose
Choose capacity based on workflow needs, not just on the largest available product.
Common fitment mistakes buyers make
The most common reason a trailer tongue box fitment project fails is not poor product quality. It is poor measurement logic.
One common mistake is measuring only the widest part of the frame. Another is treating the lid as if it requires no operating space. Many buyers ignore jack handle swing until after installation. Others forget that chains, couplers, and wiring need hand access, not just visual access.
Another frequent mistake is buying for volume before buying for layout. A bigger box feels like a better value until it starts blocking the very front-end tasks the storage was supposed to support.
The most professional way to select a trailer tongue toolbox guide size is to think like an operator, not like a catalog shopper. The box should fit the trailer, the user, and the task sequence.
How to know you found the right size
A properly sized A-frame trailer toolbox does more than sit on the tongue without falling off the edge. It creates a clean and usable front-end storage zone.
You have likely found the right size when:
- the box sits within the mounting zone cleanly
- the lid opens fully without conflict
- the jack remains easy to use
- the coupler and safety chains stay accessible
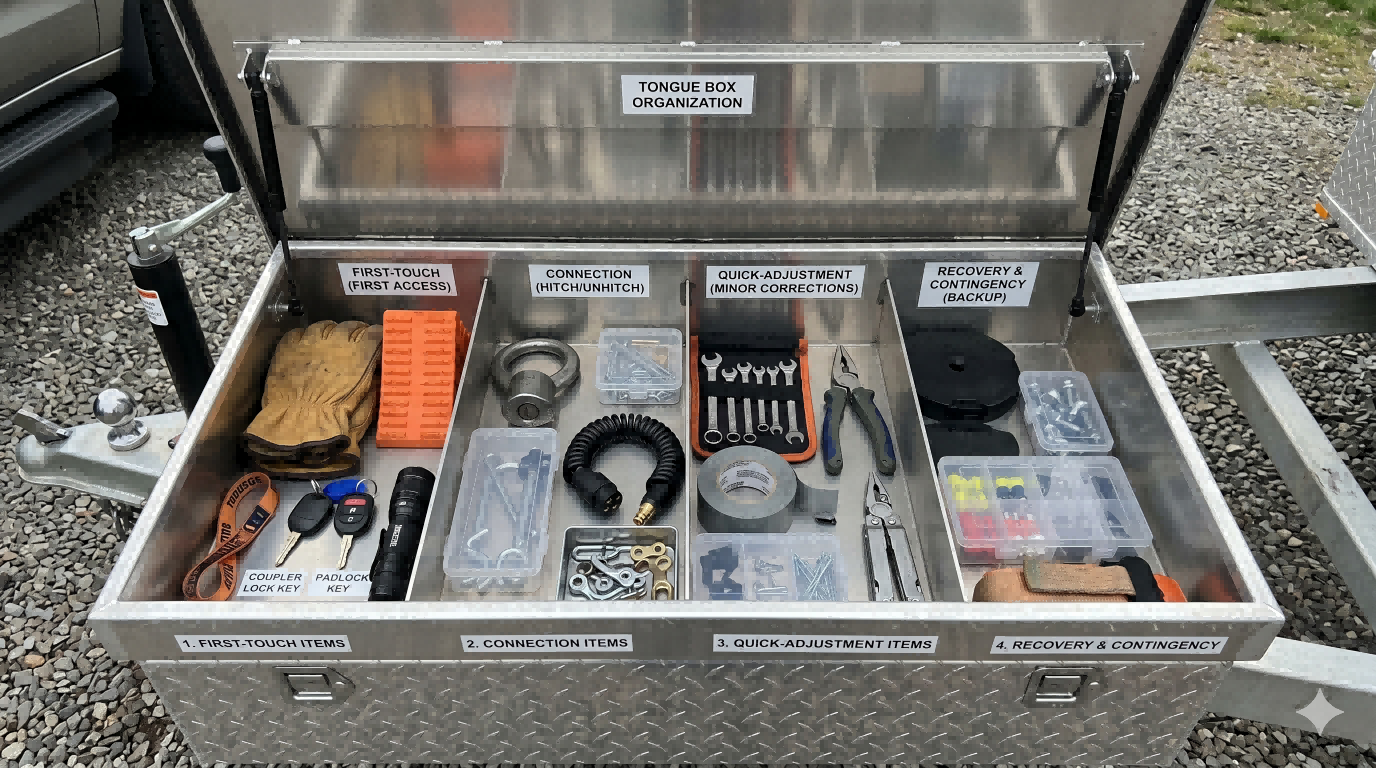
- the box holds the items that belong near the hitch area
- the trailer front looks more organized, not more crowded
That final point matters more than buyers often expect. A correct-fit box improves operational clarity. It makes the trailer easier to use, easier to maintain, and easier to trust on a daily basis.
Final thoughts
The smartest way to buy an A-frame trailer toolbox is to stop thinking in terms of advertised box dimensions alone and start thinking in terms of fitment logic.
A-frame storage works best when the box matches the real geometry of the tongue, the movement of the jack, the access needs of the coupler area, and the type of gear stored inside. That is why how to measure for trailer tongue box selection should always begin with the trailer, not the product page.
Measure the mounting zone. Measure width at multiple points. Measure usable length. Check lid clearance. Respect jack operation. Protect coupler access. Then choose a box that supports the way the trailer actually works.
That is how you avoid buying a toolbox that merely fits on paper and choose one that fits in practice.
#AFrameTrailerToolbox #TrailerTongueBox #TrailerToolboxFitment #TrailerToolboxMeasurements #TrailerStorageGuide #UtilityTrailerAccessories #TrailerSetup #TrailerFrontStorage #TowingEquipment #TrailerUpgrade #TrailerPartsGuide #FitmentGuide