
Adhesive Selection for UV Marble Sheets: Substrate Compatibility and Mock-Up Testing
The Adhesive Is Only One Link in the Wall
A contractor can use a construction adhesive that feels extremely strong in the cartridge and still end up with a failed wall. The cured adhesive may remain attached to the UV sheet while old paint peels from gypsum board. It may bond well to glazed tile but cure too slowly behind a low-permeability panel. It may grip a sample immediately yet stain, soften, or distort the panel backing after several days. In another project, the adhesive may be technically suitable, but the installer exceeds the open time and presses skinned beads against the wall.
That is why selecting a UV marble sheet adhesive should not begin with a list of “strongest glues.” It should begin with a map of the complete load path: panel backing → adhesive → primer or existing coating → substrate surface → wall assembly. The bond is controlled by the weakest layer that actually carries the load.

The site's broader UV marble sheet installation guide already explains preparation, cutting, trims, seams, and general adhesive selection. This article goes deeper into one narrower procurement problem: how a project team can approve a specific panel–adhesive–substrate combination before mass installation.
The distinction is important for importers and distributors as well as contractors. A supplier may recommend one adhesive in its domestic market, while the project uses another brand, another substrate, another climate, or another installation sequence. A generic recommendation such as “use nail-free glue” does not establish UV panel adhesive compatibility for the delivered sheet and the actual wall.
Working rule: Approve the installed combination, not the adhesive brand in isolation. Freeze the panel backing, adhesive, primer or cleaner, substrate condition, preparation, bead geometry, open time, cure conditions, temporary support, and service exposure. If one of those variables changes after the mock-up, the original evidence may no longer represent the work.
Start with Two Product Identities, Not One Product Name

A UV marble sheet normally has two faces with very different jobs. The decorative face is optimized for appearance and cleaning. The reverse face is the surface the adhesive must wet, grip, and retain. A buyer who approves only the front pattern has not yet approved the bond interface.
Define the panel reverse face
Before choosing adhesive for UV marble sheets, inspect several production-representative sheets from more than one carton. Record the backing material, gloss or texture, dust, manufacturing residue, lamination, coating overspray, ribs, local high points, protective layers, and batch-to-batch differences. The site's UV wall panel structure guide explains why visually similar sheets can use different cores and backing systems.
Do not assume that “PVC marble sheet” fully defines the adherend. Rigid PVC, a composite-filled PVC board, a laminated back film, a coated back surface, and a recycled-content formulation can present different surfaces to the adhesive. A rough-looking back is not automatically bond-ready: the roughness may consist of weak dust or an unstable skin. A smooth back is not automatically unacceptable either; some adhesives are designed for non-porous surfaces when the manufacturer explicitly permits that use.
The purchasing specification should therefore identify the actual back surface. If the supplier changes the backing treatment, film source, formulation, or factory process after approval, treat the change as a technical deviation rather than a harmless commercial substitution.
Define the adhesive as a controlled product
A phrase such as PVC wall panel adhesive is a search category, not a technical specification. Record the manufacturer, exact product, formulation or SKU where relevant, lot number, shelf-life status, technical-data-sheet revision, and required primer or cleaner. The same manufacturer can sell several construction adhesives with very different compatibility limits and cure mechanisms.
Official product information demonstrates why generic adhesive categories are unsafe. Henkel currently lists Loctite Power Grab Ultimate as compatible with many common materials including rigid and cellular vinyl/PVC trim and molding, and says it can bond two non-porous surfaces. Its technical data also states that cure time depends on temperature, humidity, substrate porosity, and adhesive amount. [1] [2]
By contrast, the published SikaBond Construction Adhesive data sheet includes an explicit “do not use on PVC based material” limitation while also requiring sound, clean, dry surfaces free from oil, grease, curing residues, and other contamination. [3]
These examples are not product endorsements or a ranking. They prove a more useful procurement principle: two products both sold as “construction adhesive” can have opposite manufacturer positions on PVC. The correct construction adhesive for PVC panels is therefore the specific product whose documentation and project validation cover the actual panel and substrate.
Create a Substrate Passport Before the Adhesive Matrix
Wall panel substrate preparation should begin with identification, not sanding. The adhesive bonds to the outermost load-carrying layer that it touches. On a painted wall, that may be paint over primer over joint compound over paper-faced board. On an old tile wall, it may be detergent residue or silicone contamination on glaze. On concrete, it may be laitance, sealer, curing compound, dust, or a weak skim coat.
A useful “substrate passport” records the material, surface finish, age, repairs, coatings, contamination, moisture history, flatness, and local weak areas. It should distinguish the structural wall from the surface that actually receives adhesive.
| Substrate condition | Questions before approval | Representative risk | Mock-up requirement |
|---|---|---|---|
| Painted gypsum board | Is the paint sound? Is the paper face intact? Are joints and repairs softer than field areas? Is the coating washable, chalking, glossy, or unknown? | The adhesive bonds strongly to paint, but the paint or paper releases from the wall | Include both normal field paint and repaired/joint-compound zones |
| Bare gypsum board or plasterboard | Is the paper torn or dusty? Are joint compounds fully cured and stable? Has the board been moisture damaged? | Surface fiber or compound becomes the weak plane | Include finished and repaired areas representative of site work |
| Cementitious plaster or concrete | Is the surface sound, dry under the project requirement, free of laitance, dust, curing residues, coatings, and active moisture sources? | Weak near-surface material or contamination controls the bond | Use the prepared project surface, not a clean laboratory block |
| Existing ceramic or porcelain tile | Are tiles securely bonded? Is glaze contaminated with soap, wax, silicone, grease, or cleaner residue? Is abrasion or primer permitted? | The adhesive bonds to a contaminated glaze, or the old tile itself is loose | Include grout lines and the exact cleaning/preparation route |
| Plywood or wood-based backing | Is the panel dry, stable, sealed, treated, painted, or resin-rich? What movement is expected? | Wood movement, coating release, or incompatible surface treatment | Use the actual grade, finish, orientation, and fixing condition |
| Metal, glass, or other non-porous surface | What alloy/coating exists? Is oxidation, oil, release agent, or surface treatment present? | Low wetting, contamination, differential movement, or slow cure | Use exact surface finish and approved preparation |
Sika's current construction-adhesive guidance provides a useful general preparation principle: the substrate should be sound, clean, dry, and free of contaminants such as dirt, oil, grease, cement laitance, old sealants, and poorly bonded coatings. [4] That principle does not tell a UV-panel installer exactly how to prepare every wall; it tells the project team why a preparation method must be attached to the specific substrate.
Painted walls require a “weakest layer” check
Many interior projects treat painted gypsum board as an easy substrate. It is easy only when the paint system and board are sound. A high-grab adhesive can pull harder on the paint than the paint can pull on the primer, joint compound, paper face, or previously repaired area. The result may look like adhesive failure from a distance even though the adhesive remains attached to a sheet of peeled paint.
Do not solve this by automatically sanding every painted wall. First determine whether the coating is retained, removed, abraded, or primed under the approved system. Then build the same condition into the mock-up. If the project has multiple paint histories, select representative zones rather than validating only the best wall.
Old tile changes both chemistry and wall reliability
The existing site guide already explains that UV panels may be installed over tile only when the tile wall is solid, flat, dry, and clean, and that loose tiles, deep grout lines, old silicone, moisture, and contamination can undermine the work. Installing UV marble sheets over existing tile is therefore an existing-wall assessment, not merely an adhesive selection problem.
For a tile mock-up, include actual grout lines and cleaned glaze. If the approved system requires abrasion, primer, or another pretreatment, document the exact product and procedure. A laboratory coupon bonded to new ceramic does not prove compatibility with a twenty-year-old bathroom wall covered with cleaning residue.
Moisture is a stop condition when its source is unresolved
A damp substrate changes both adhesion and the risk behind a low-permeability decorative panel. In kitchens and bathrooms, the site's UV wall panel kitchen and bathroom guide already distinguishes surface splash resistance from the condition of the concealed wall. A mock-up should not be used to approve installation over active leakage or unresolved dampness.
If the adhesive or substrate manufacturer provides a moisture limit or test requirement, use the specified procedure and units. Do not import a floor-covering moisture threshold into wall work simply because both substrates are concrete. The relevant project team should determine the applicable method.
Choose the Cure Mechanism Before You Compare Grab Strength

Marketing language often emphasizes “instant grab,” “heavy duty,” or “waterproof.” Those descriptions can matter for productivity, but they do not explain how the adhesive builds final strength inside the wall. Cure architecture is a better first filter.
Water-dispersed adhesives need a realistic drying path
Some water-based adhesives depend heavily on moisture leaving the bond. If both the UV-sheet back and the wall are low-porosity, a thick continuous bed can dry much more slowly than it does between absorbent materials. A Henkel technical sheet for a water-based interior construction adhesive states that low-porosity applications may require seven days or longer to achieve full strength, illustrating why “24-hour cure” cannot be copied between products and substrates. [5]
This does not mean water-based chemistry is unsuitable for UV panels. MAPEI, for example, documents acrylic water-dispersion adhesives for PVC wall coverings in specific systems. [6] The lesson is that the specific product, backing, substrate, open time, coverage, and drying path must agree.
Moisture-curing and silane-modified systems can behave differently
Some hybrid or silane-modified products cure with environmental moisture and are marketed for a broad range of porous and non-porous materials. The Loctite Power Grab Ultimate technical data identifies a silane-modified polymer base, provides temperature and humidity conditions, and even lists a plant mister among tools for bonding two non-porous surfaces. [2]
That detail should not be generalized into “spray water behind every panel.” It shows why installers must follow the exact manufacturer procedure. A different moisture-curing adhesive may specify another bead size, humidity range, or preparation route.
Solvent-containing products demand compatibility evidence
Solvent-containing adhesives may provide useful application properties in some systems, but the solvent can also affect certain plastics, coatings, foams, or decorative layers. Do not assume “strong solvent smell” means stronger bonding. Obtain written compatibility for the finished panel, and perform a representative observation period for softening, staining, swelling, warping, or back-surface change where appropriate.
The same rule applies in reverse: “solvent free” is not automatic approval. The product still has to wet the panel back, bond the substrate, cure in the available environment, tolerate service conditions, and remain compatible with any primer, sealer, trim, or sealant.
Contact systems and mounting tapes need their own process
Some wall-covering or panel systems use contact adhesives or high-performance mounting tapes for immediate hold. MAPEI's wall-covering guidance documents contact systems for specific PVC applications, and Bostik describes mounting tapes used for wall panels and interior fittings. [6] [7]
These approaches should not be copied as universal UV-marble-sheet solutions. They demonstrate that “adhesive” can mean different application architectures, each with its own preparation, pressure, open-time, and surface requirements.
Bead Geometry Is Part of the Specification

Two crews can use the same UV wall panel adhesive and create two different wall systems because they apply it differently. A bead, serpentine pattern, spot pattern, or full spread changes bond-line thickness, contact area, cure path, ability to accommodate wall irregularity, and risk of telegraphing through a glossy sheet.
For large UV marble panels, the installation method should define nozzle size, bead diameter, spacing, edge distance, orientation, and any zones where adhesive must not be placed. It should also define how the sheet is pressed and supported so that the adhesive is transferred without collapsing into an uncontrolled film.
Do not use adhesive to level a wall unless the system is designed for it
A thick adhesive bead can sometimes accommodate small surface variation, but using random extra adhesive to bridge large depressions changes cure time, bond-line geometry, and panel plane. High-gloss sheets are particularly sensitive because uneven pressure can create visible waves or hollow zones.
Correct substrate flatness under the approved wall-preparation method rather than treating the adhesive as an unspecified leveling compound. The broader installation guide explains why wall flatness becomes more visible under glossy surfaces. Wall inspection and flatness control should be completed before the compatibility mock-up.
Open time is a process limit, not a suggestion
If adhesive skins before the panel is placed, the bead may look complete while transfer is poor. Record the application start, panel placement time, temperature, and relative humidity during the mock-up. Then design the working area so production crews can stay within the approved window.
For multi-panel walls, installers often apply too much adhesive in advance because they want speed. The better productivity measure is accepted installed area per crew-hour, not how many meters of adhesive are dispensed before placement.
Use a Five-Gate Compatibility Program
A professional wall panel adhesion test program should move from low-cost screening to representative installation. Each gate eliminates a different uncertainty. The sequence below is an editorial framework, not a standard mandated for every project.
| Gate | Question | Evidence | Release condition |
|---|---|---|---|
| 1. Document screen | Does the adhesive manufacturer permit the actual panel and substrate materials? | Current technical data, written compatibility, exclusions, primer/cleaner instructions | No unresolved material exclusion |
| 2. Surface screen | Are the delivered panel back and project substrate sound and clean enough to test? | Panel-back photos, substrate passport, contamination and coating checks | Representative surfaces identified |
| 3. Small compatibility trial | Does the adhesive wet, cure, and remain compatible with each surface? | Controlled small specimens and qualitative observations | No softening, staining, persistent uncured material, or obvious interface rejection |
| 4. Representative wall mock-up | Can the real crew build the actual detail with acceptable appearance and bond behavior? | Production sheet, actual wall, specified bead pattern, trims/cut-outs, cure record, photos | Pre-agreed appearance, process, and adhesion criteria met |
| 5. First-off site release | Does production installation match the approved mock-up? | First installed bay, material lots, transfer check, environment, hold-point signoff | Written release before scaling installation |
Gate 1: document screening can eliminate obvious mismatches
The cheapest test is reading the data sheet carefully. Search for approved materials, excluded materials, application temperature, service temperature, open time, cure behavior, cleaning, primer requirements, and restrictions on painted or non-porous surfaces.
Do not accept a distributor's generic statement when the manufacturer data sheet says otherwise. Where the data sheet does not name the exact panel backing, obtain written technical confirmation before the mock-up.
Gate 2: the substrate must be representative before testing
A mock-up on a new cement board panel in the workshop does not validate an old painted gypsum wall on site. If the project includes several substrate conditions, either choose the highest-risk representative condition or build separate trials. Include repaired joints, skim-coated areas, tile transitions, or other weak zones when they are common in production work.
Gate 3: small trials are for screening, not final approval
ASTM D3808-01(2021) describes a quick qualitative spot-adhesion method for screening whether an adhesive will bond to a substrate and for comparing candidates. ASTM explicitly frames it as a qualitative screen before quantitative procedures when required. [8]
That is useful logic for early UV panel adhesive compatibility work: eliminate combinations that obviously fail to wet, cure, or remain attached. But do not convert a successful small spot into a warranty for a full-height panel. Large sheets introduce gravity, bow, wall irregularity, bead geometry, temporary support, and workmanship variables that small spots do not reproduce.
Gate 4: build the mock-up as a production rehearsal
A meaningful wall panel mock up should use the actual or production-representative panel, actual substrate condition, specified adhesive lot, primer or cleaner, bead geometry, open time, pressure, temporary support, trims, joints, cut-outs, and expected environment. It should be large enough to expose alignment, panel bow, adhesive transfer, and working-time problems. For a large-format UV sheet, one or more full panels may be more informative than a small decorative sample.
Commercial projects benefit especially from this stage. The site's commercial UV marble panel renovation guide already emphasizes sample rooms, sequencing, and phased installation. The adhesive mock-up is the technical release point inside that larger rollout.
Gate 5: approve the first production work, not only the sample wall
After the mock-up is accepted, inspect the first installed production bay. Confirm the delivered panel batch, adhesive and primer lots, wall preparation, environmental conditions, bead pattern, open time, support, and final plane. If the first-off work differs from the mock-up, stop and resolve the difference before hundreds of square meters hide the evidence.
Write Acceptance Criteria Before Building the Mock-Up
A mock-up without predefined acceptance criteria can become a visual argument. One person likes the wall, another pulls at an edge, and the supplier says the bond will improve tomorrow. The acceptance sheet should be written before application.
| Field | What to record | Example decision question |
|---|---|---|
| Material identity | Panel model/batch, adhesive lot, primer/cleaner, substrate zone and coating | Does this specimen represent production materials? |
| Preparation | Cleaning, abrasion, removal, primer, drying time and tools | Can the site crew reproduce it consistently? |
| Application | Nozzle, bead pattern, spacing, quantity, open time, placement pressure | Was the approved bond geometry achieved? |
| Cure environment | Temperature, humidity, ventilation and cure duration before evaluation | Was the bond evaluated at a documented stage? |
| Appearance | Panel plane, waves, telegraphing, staining, squeeze-out, seam movement, edge lift | Does the finished wall meet the visual requirement? |
| Transfer | Observed adhesive contact where sacrificial checking is permitted | Did the bead wet both adherends as intended? |
| Failure mode | Where separation occurs during the agreed evaluation | What layer is actually the weakest link? |
| Disposition | Approve, revise preparation, change product, retest, add support, or reject | What exact action closes the issue? |
Do not invent a universal pull force, percentage coverage, or cure time for every UV panel. Those values depend on panel mass and stiffness, adhesive chemistry, substrate, test geometry, exposure, and project requirements. If the project needs a quantitative criterion, the method and threshold should be selected by the responsible technical party before testing.
Quantitative Pull-Off Numbers Need Method Discipline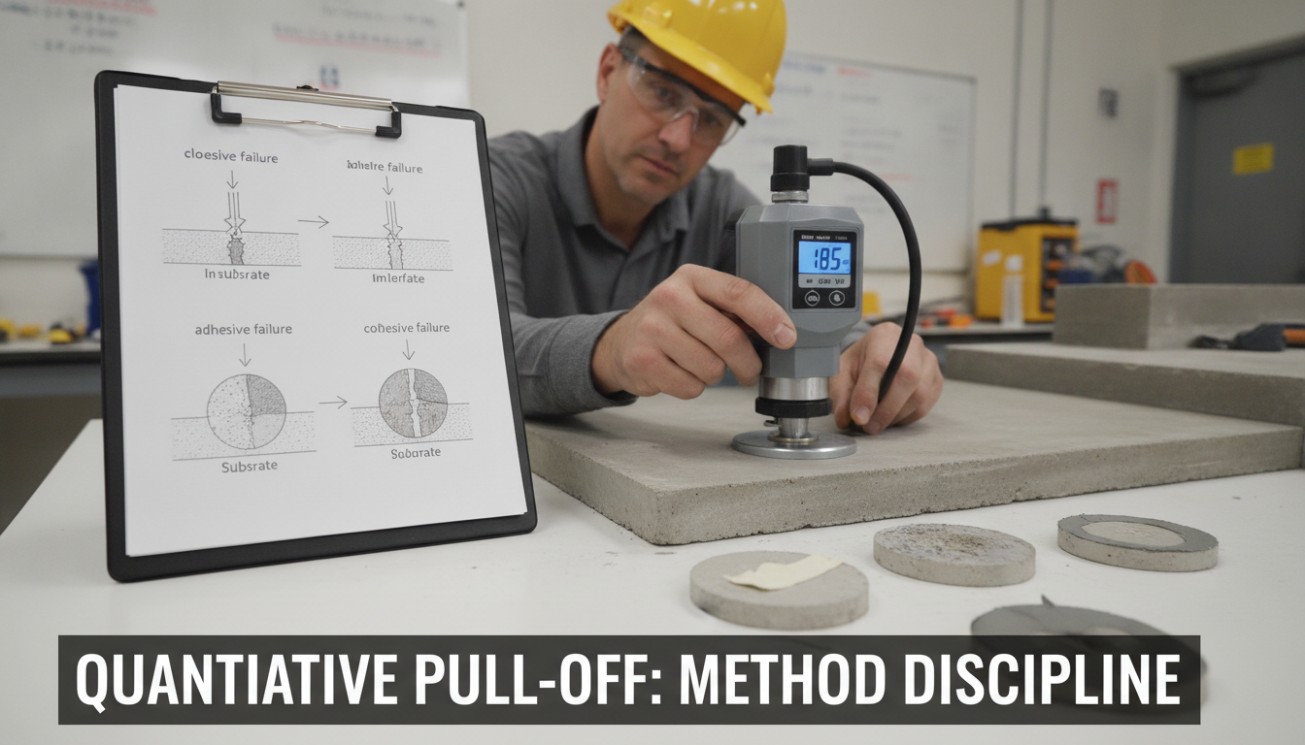
Project teams sometimes request a pull-off result because a number appears more objective than a visual mock-up. A number is useful only when the method fits the question.
ASTM D7234-22 covers pull-off strength of coatings on concrete and emphasizes that results vary with instruments, substrates, and fixtures; it also requires the failure plane to be observed. [9] ASTM C1583/C1583M-25 addresses tensile strength of concrete surfaces and bond or tensile strength of concrete repair/overlay materials, and likewise emphasizes that the measured result is controlled by the weakest failure mechanism and that failure mode must be recorded. [10]
Neither standard should be casually relabeled as “the UV marble panel adhesive test.” Their scope is different. They are useful professional references for two principles: surface strength matters, and failure mode matters. If a project adapts a pull-off concept to a panel system, the responsible specifier should define specimen preparation, fixture, cut/no-cut condition, cure, loading, interpretation, and repair.
A high number obtained by tearing weak gypsum paper may not be a good wall result. A lower number with stable cohesive behavior may be more predictable. Procurement should not compare pull-off figures from different methods, instruments, or substrates as though they were interchangeable product ratings.
Read the Fracture Surface Before Blaming the Adhesive
ISO 10365:2022 provides standardized designations for main failure patterns in bonded assemblies. [11] A project does not need to reproduce the standard's diagrams in a field checklist, but it should preserve the same diagnostic idea: identify where the assembly actually separated.
| Observed fracture | What it suggests | Next investigation |
|---|---|---|
| Clean separation from panel back | Panel-side wetting, contamination, surface treatment, or chemistry may be controlling | Check back-surface identity, cleaning, primer, batch change, and manufacturer compatibility |
| Clean separation from wall surface | Substrate contamination, low wetting, or preparation may be controlling | Check dust, glaze, coating, primer, and preparation route |
| Adhesive tears within itself | The adhesive body is the weak plane under this test condition | Check cure state, bond thickness, conditioning, and whether the result meets the project criterion |
| Paint peels from wall | The paint/coating system controls the assembly | Assess coating adhesion and whether it should be removed, stabilized, or differently prepared |
| Gypsum paper or skim coat tears | The substrate surface is weaker than the bond path | Assess substrate condition and consequence; stronger glue alone may increase damage |
| Panel backing or core tears | The panel layer controls the test | Check depth, consistency, product batch, and whether the failure is acceptable for the intended load path |
| Mixed fracture | More than one interface or material contributes | Photograph both faces and estimate locations rather than reporting only “mixed” |
Photograph both sides immediately after the agreed destructive check. Include the specimen ID, orientation, scale, cure age, and environmental history. Do not scrub the fracture surface clean before documentation.
Three Hypothetical Compatibility Decisions
Illustrative cases only: The following scenarios are original decision exercises. They do not describe actual supplier failures, laboratory results, or recommended products. Replace every assumption with project-specific evidence.
Case A: painted gypsum board passes “grab” but fails the wall

A hotel corridor uses a 3 mm UV marble sheet over existing painted gypsum board. The selected adhesive is documented as compatible with the panel backing and painted construction surfaces. A small hand sample has excellent initial grab.
The full-wall mock-up is allowed to cure under the specified conditions. During the agreed destructive evaluation, the adhesive remains attached to the panel, but a broad paint film peels from joint-compound areas while field-painted board remains intact.
Decision: HOLD. The problem is not solved by choosing a “stronger” adhesive. The project team must address the weak painted/joint-compound surface, define preparation for repaired areas, and repeat the mock-up on the revised substrate. The acceptance record should distinguish the two wall zones.
Case B: glazed tile and a low-porosity panel create a cure problem
A retail renovation proposes installation over sound glazed tile. Candidate Adhesive A is water-based and technically permitted for wall coverings, but its data indicates that drying depends on substrate porosity. Candidate Adhesive B uses a different cure mechanism and has written compatibility with the actual panel back and tile.
After the same elapsed time, the small trial for Candidate A remains soft in the center of a wide continuous spread, while Candidate B reaches the documented evaluation stage. The result does not prove that all water-based adhesives fail on tile. It proves that this candidate, geometry, and cure path require further review.
Decision: REVISE OR RETEST. The team can change adhesive, change application geometry if the manufacturer permits it, extend cure and support time, or obtain manufacturer guidance. Do not release mass installation simply because the edges feel dry.
Case C: bathroom vanity bond is good, but the wall is still not ready
A vanity-wall mock-up shows good panel contact and stable cured adhesion. During site survey, however, moisture staining and recurring dampness are found around plumbing penetrations behind adjacent finishes.
Decision: HOLD THE SUBSTRATE. The successful mock-up does not authorize covering an unresolved moisture source. Repair and verify the wall condition first, then confirm that the prepared substrate still matches the validated system. The site's kitchen and bathroom application guide treats the concealed wall and interfaces as part of wet-area performance.
Temporary Support Must Be Designed into the Work Sequence
Initial grab can reduce sliding, but a large vertical sheet may still need temporary restraint while the adhesive develops strength. The requirement can depend on panel weight, bow, bond-line thickness, substrate, open time, cure mechanism, and location.
Temporary restraint can include removable tape, braces, battens, spacers, clamps, or project-approved mechanical assistance. The method should not damage the glossy face or distort seams. Record when the support can be removed under the actual cure conditions.
Do not treat a brad nail, screw, or hidden fastener as an informal backup if the finished wall relies on it permanently. Permanent mechanical restraint creates another load path and should be detailed, approved, and coordinated with panel strength, edge distances, penetrations, fire or moisture requirements, and visual design.
Control Changes After the Mock-Up
A mock-up is valuable only if production work remains the same system. Procurement should define changes that trigger review. Typical triggers include:
- different panel factory, core formulation, backing film, or reverse-face treatment;
- different panel thickness or large change in dimensions or mass;
- different adhesive product, formulation, lot outside shelf life, or storage history;
- different primer, cleaner, solvent, or surface-preparation method;
- different wall coating, substrate repair material, or tile condition;
- different bead geometry, coverage, open time, or temporary support;
- installation outside the approved temperature or humidity range;
- new wetting, heat, cleaning, or service exposure.
The site's UV marble sheet supplier guide already recommends written checkpoints and control of substitutions in bulk orders. Adhesive compatibility should be one of those checkpoints. A supplier or installer should not replace the approved adhesive with a “similar” tube because the original product is temporarily out of stock.
Use a B2B Approval Record That Can Be Audited Later
For a small home feature wall, a brief record may be enough. For hotels, apartments, retail chains, and distributor installation programs, the approval should be reconstructable months later. This protects the buyer, installer, and supplier when a complaint appears.
| Record field | Required information | Why it matters |
|---|---|---|
| Panel | Manufacturer, model, backing description, batch, dimensions, mass and approved sample | Links the bond evidence to the product actually installed |
| Substrate | Material, coating, repair zones, moisture history, preparation and location | Prevents a clean test board from being substituted for the real wall condition |
| Bonding products | Adhesive, primer, cleaner, lots, shelf-life status and data-sheet revisions | Controls chemistry and accessory substitutions |
| Application process | Nozzle/bead map, coverage, open time, pressure and temporary restraint | Makes the mock-up reproducible by production crews |
| Cure conditions | Temperature, humidity, ventilation, duration and support-removal time | Separates insufficient cure from true incompatibility |
| Mock-up result | Appearance, transfer, destructive observations, failure mode and photographs | Shows what was actually accepted |
| Exceptions | Open deviations, concessions and required retest actions | Stops verbal assumptions from becoming permanent approval |
| Release | Installer, contractor QC, supplier/technical representative and project approver as required | Defines who authorized mass installation |
The record should not be marketed as a laboratory certificate unless it actually comes from a qualified laboratory under an applicable test method. A project mock-up is evidence of a particular site combination and workmanship process; it is not universal certification for every wall.
Focused FAQ
What is the best adhesive for UV marble sheets?
There is no universal best adhesive. The appropriate UV marble sheet adhesive must be compatible with the actual panel backing and prepared substrate, cure under the site conditions, support the required installation geometry, and satisfy the project's environmental and service requirements. Manufacturer documentation plus a representative mock-up is more useful than a generic “strongest glue” recommendation.
Can a general construction adhesive be used on PVC wall panels?
Sometimes, but only when the specific product permits the actual PVC or composite surface. Manufacturer instructions differ substantially. One current Loctite product lists rigid and cellular vinyl/PVC among suitable materials, while a published Sika construction-adhesive data sheet explicitly says not to use that product on PVC-based material. The category name “construction adhesive” is therefore not sufficient evidence. [1] [3]
Can UV marble sheets be glued directly to painted drywall?
They may be when the panel, adhesive, paint system, and wall are compatible and sound. The risk is that paint, primer, joint compound, or gypsum paper can become the weakest layer. Include representative painted and repaired zones in the mock-up. If paint peels from the wall, a stronger adhesive does not automatically solve the problem.
Can UV panels be installed over existing tile?
Potentially, if the tile is securely bonded, sufficiently flat, dry for the project condition, clean, and compatible with the specified preparation and adhesive. Old silicone, wax, soap residue, grease, weak grout, loose tiles, or hidden moisture can invalidate the bond. Test the actual prepared tile wall rather than relying only on a new ceramic coupon.
How long should an adhesive mock-up cure before evaluation?
Use the specific adhesive manufacturer's cure instructions and the actual temperature, humidity, porosity, and bond geometry. Do not assign one universal 24-hour rule. Some product data explicitly notes that low-porosity applications can take substantially longer to reach full strength. [5]
Does strong initial grab prove long-term adhesion?
No. Initial grab is mainly a positioning and productivity property. Final bond behavior depends on cure, surface strength, bond geometry, movement, moisture, heat, cleaning exposure, and the weakest layer in the assembly. Temporary support may still be necessary even when the panel does not slide immediately.
Should a wall-panel mock-up include a destructive adhesion check?
Where the project risk justifies it, a pre-agreed destructive or semi-destructive evaluation can reveal the actual failure plane. The method must be defined before testing and should not be casually described as a standardized pull-off test unless it follows that standard's scope and procedure. Photograph both fracture faces and record the failure mode.
What does adhesive failure at the paint layer mean?
If the adhesive remains bonded to the paint but the paint separates from the wall, the coating system is controlling the test. Investigate the paint, primer, underlying compound or board, and surface preparation. Do not automatically blame the adhesive.
When should a project repeat the mock-up?
Repeat or proportionately revalidate when a material or process changes enough that the original evidence may no longer represent production work—for example, a new panel backing, adhesive, primer, substrate coating, preparation method, bead geometry, environment, or exposure condition.
What should B2B buyers request from suppliers?
Request the panel backing description, recommended PVC wall panel installation adhesive options where applicable, current product data sheets, compatibility limitations, required primer or cleaner, application and cure conditions, mock-up guidance, and written notice of product changes. Then validate the exact project combination rather than treating the supplier recommendation as universal approval.
Sources and Compatibility Method
[1] Henkel / Loctite: Loctite Power Grab Ultimate product page. Used as an example of a construction adhesive currently marketed for many common materials, including selected PVC/vinyl applications and non-porous surfaces.
[2] Henkel: Loctite Power Grab Ultimate technical data. Used for cure-condition, open-time, non-porous-surface, and preparation examples.
[3] Sika: SikaBond Construction Adhesive product data sheet. Used to demonstrate a product-specific PVC exclusion and general substrate-preparation requirements.
[4] Sika: SikaBond-115 Strong Fix. Used for current substrate-preparation principles and application-control context.
[5] Henkel: Loctite Power Grab Express All-Purpose technical data. Used to illustrate how low substrate porosity can lengthen cure time for a water-based adhesive.
[6] MAPEI: Installing resilient wall and floor coverings. Used to show that PVC wall-covering systems can use different adhesive architectures and open-time behavior.
[7] Bostik: Bostik Roll mounting systems. Used as an example of wall-panel and PVC-covering bonding systems that rely on controlled substrate preparation and product-specific instructions.
[8] ASTM International: ASTM D3808-01(2021). Used for the concept of qualitative spot-adhesion screening before more detailed quantitative assessment.
[9] ASTM International: ASTM D7234-22. Used for professional principles concerning pull-off measurements on coatings over concrete, instrument dependence, cure state, and failure-plane reporting.
[10] ASTM International: ASTM C1583/C1583M-25. Used for the relationship between near-surface concrete strength, bond testing, and failure-mode interpretation.
[11] ISO: ISO 10365:2022. Used for the principle of identifying and documenting failure patterns in bonded assemblies.
Editorial method: Sources reviewed September 24, 2026. Manufacturer products are included as contrasting documentation examples, not as endorsements or universal recommendations. The substrate passport, five-gate validation program, acceptance table, three scenarios, and approval record are original editorial tools. No adhesive in this article is approved for a specific UV marble sheet unless the relevant manufacturers and project team document that exact combination. ASTM and ISO standards are summarized from their public publisher descriptions and are not reproduced. Obtain current standards, manufacturer instructions, and competent project review before issuing a production bonding specification.
#UVMarbleSheets #WallPanelAdhesive #SubstrateCompatibility #AdhesiveTesting #WallPanelMockUp #ConstructionAdhesives #B2BProcurement #InstallationQuality #BuildingMaterials #QualityAssurance


