
How to Choose Tent Stakes for Sand, Soft Soil and Hard Ground
Match the stake to the ground before comparing weight
Choose tent stakes around the ground you expect to use, the attachment points on your shelter, and the complete kit you are willing to carry. A general-purpose peg can be a practical starting point for ordinary soil. Loose sand may call for a wider anchor or a manufacturer-approved buried arrangement. Firm, stony ground raises a different question: whether a suitable stake can be installed properly without bending, breaking, or stopping on buried rock.
The useful purchase is therefore a combination of stake geometry, installation method, and expected campsite conditions. An expensive material cannot compensate for unsuitable ground. A longer peg is not automatically effective if only a small part enters the soil. Equally, a light peg that works at one sheltered campsite does not establish the performance of the same shelter on an exposed beach.
For retailers, importers, and rental operators, this changes how an accessory should be sold. The buyer needs to understand what the supplied set is intended to do, which conditions may require alternatives, and how to identify replacement parts. This guide concerns portable camping tents. Anchoring a large event tent or temporary building requires the engineering and site-specific documentation appropriate to that structure.
Read the campsite before choosing a peg
Start with the material that will actually surround the installed stake. A campsite described as “grass” may contain firm soil, recently disturbed loose soil, or a shallow layer over stone. Sand can vary across the same pitch. A hard surface can conceal a softer layer beneath it, while apparently usable earth can stop abruptly at a rock. The surface description alone leaves important information out of the decision.
Inspect where the tent and its required guy lines would sit, not just the patch under the sleeping area. A comfortable floor location can leave a crucial attachment point over a path, exposed rock, or ground that cannot accept a peg. Check the campsite's rules and any marked restrictions before driving or burying anchors. If the required arrangement cannot be established, choosing a different pitch is part of selecting the system.
Ask three practical questions. Can this stake be installed as intended here? Does the attachment remain secure when the tent is correctly tensioned? Can the stake be removed and recovered without damaging it or leaving hardware behind? These observations help reject a poor match. They do not provide a measured wind rating or replace the shelter manufacturer's limits and weather guidance.
| Ground condition | Candidate approach | What to check on site |
|---|---|---|
| Ordinary, penetrable soil | Start with the tent's supplied or recommended general-purpose pegs. | Installation depth, attachment security, and the position of every required guy point. |
| Loose or soft soil | Consider a design specifically intended for softer ground, subject to the tent's instructions. | Whether the stake loosens, rotates, or moves as the shelter receives normal setup tension. |
| Loose sand | Consider broad sand anchors or a documented buried arrangement. | Suitable ground, correct attachment method, permitted use, and a reliable recovery plan. |
| Firm ground with scattered stones | Choose a suitable robust peg and an installation tool approved for it. | Hidden obstructions, damage during insertion, and whether the intended depth is achievable. |
| Very shallow soil or exposed rock | Reconsider the pitch or use an explicitly approved alternative arrangement. | Do not treat a partly inserted peg or improvised weight as a verified replacement. |
Separate shape, usable length, and material
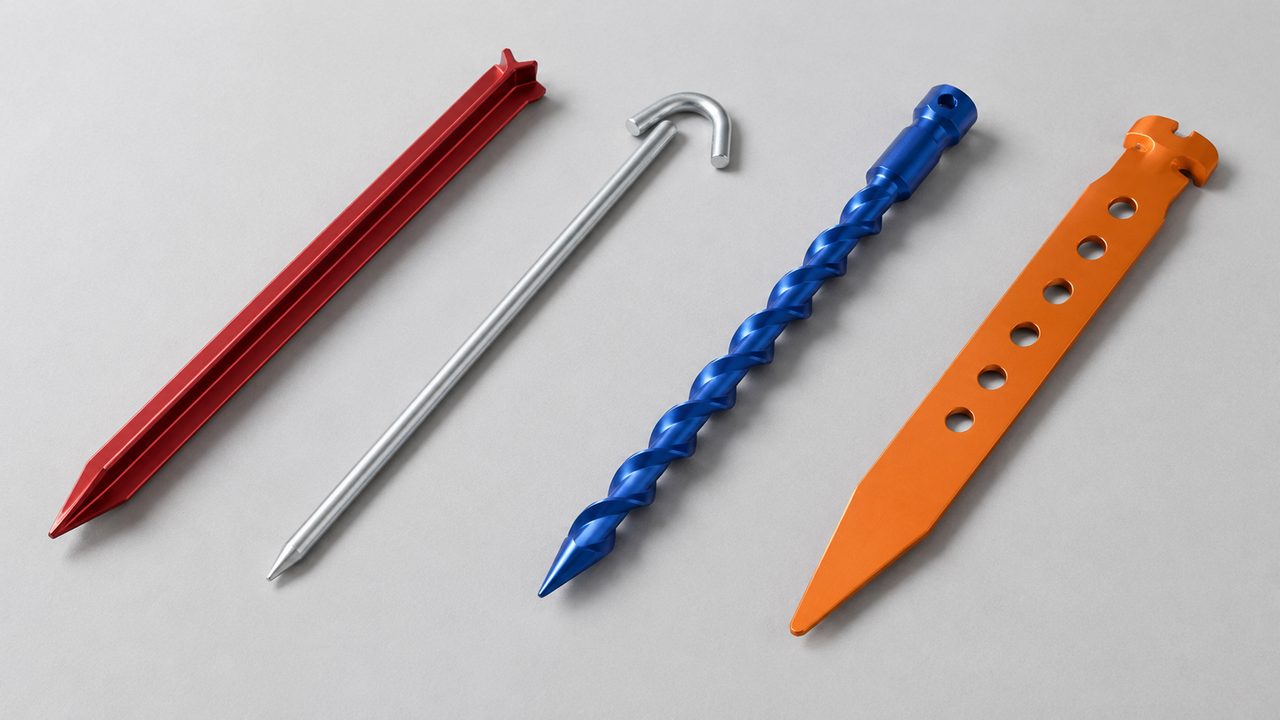
The range sold as tent pegs includes narrow pins, profiled metal stakes, broad plates, and specialty designs. Their differences matter before the material label does. Inspect the portion that enters the ground, the head that accepts installation force, and the notch, hook, or hole that connects the tent. Those features determine how the user installs the peg and how the line remains attached.
Usable length deserves its own check. Overall length can include a head or attachment feature that will stay above the ground. Product photographs do not always make this distinction obvious. Compare drawings or physical samples, then check the installation instructions. Avoid turning a stated length into a universal recommendation: the ground, stake geometry, and intended arrangement still have to work together.
Material is one part of that comparison. A description such as aluminum, steel, or titanium does not by itself specify the stake's dimensions, finished shape, manufacturing quality, or behavior in a particular soil. Buyers considering titanium tent stakes should compare the actual products and intended use, rather than assuming that the material name establishes greater holding power or immunity to damage.
Look closely at the connection as well. A line must fit the intended notch or opening and remain seated in the recommended orientation. Check for rough edges that could abrade cord, and distinguish a retrieval loop from the point intended to carry the shelter's attachment. A convenient handle is not automatically an approved load connection. The instructions should make the distinction clear.
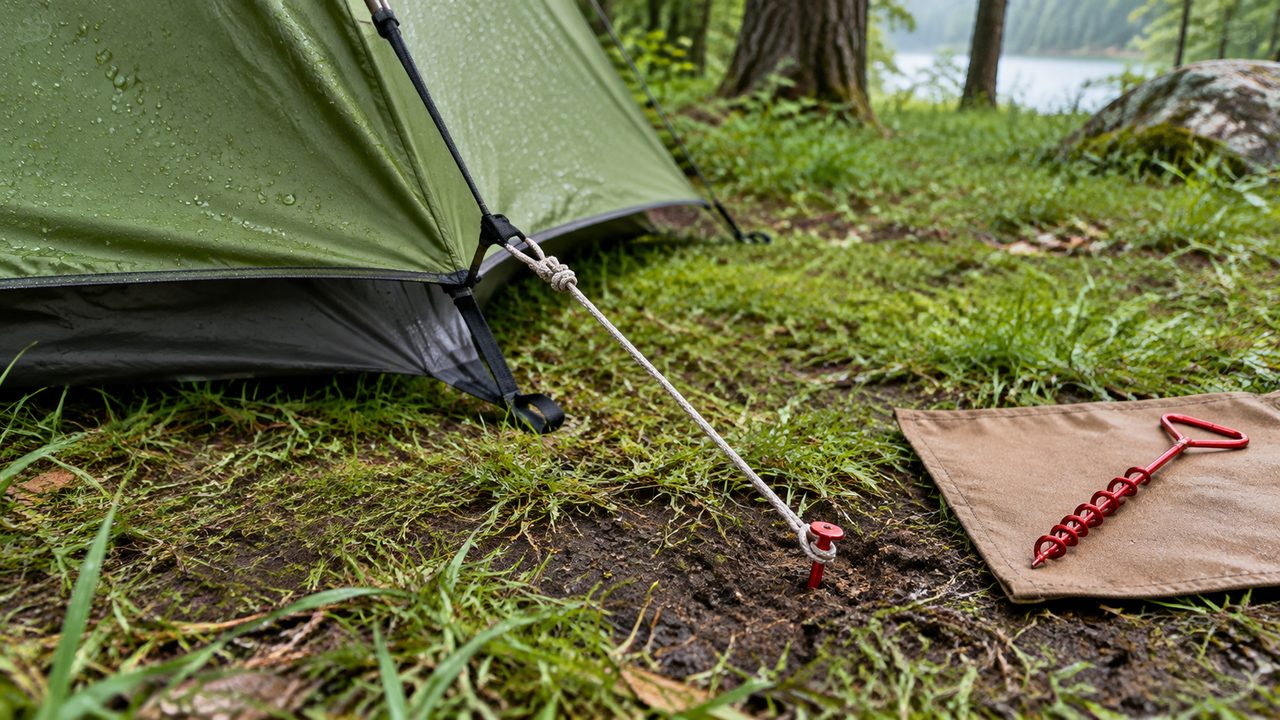
Soft soil needs an appropriate design and a usable pitch
When a peg enters very easily, setup can feel reassuringly quick. That ease does not establish that the surrounding soil will resist the tent's pull. Watch what happens while the shelter is being tensioned: a stake that shifts, twists noticeably, or creates a widening opening deserves attention before bedding and equipment are moved inside. Repeatedly tightening the same line does not resolve an unsuitable ground connection.
Manufacturers offer different approaches to this problem. For example, MSR describes its Cyclone as a spiral-design stake for softer soil. That is a useful selection cue, but it remains a product-specific statement, not proof that one design will suit every loose campsite. Compare the recommended use with the ground you expect, and follow the product's installation method.
For a retailer, the practical question is whether a customer needs a complete alternative set or a small number of additional stakes for identified attachment points. For a rental fleet, record which approved set is supplied with each tent and trip package. If a customer reports repeated movement at one location, ask about the ground and setup rather than automatically supplying the same peg again.
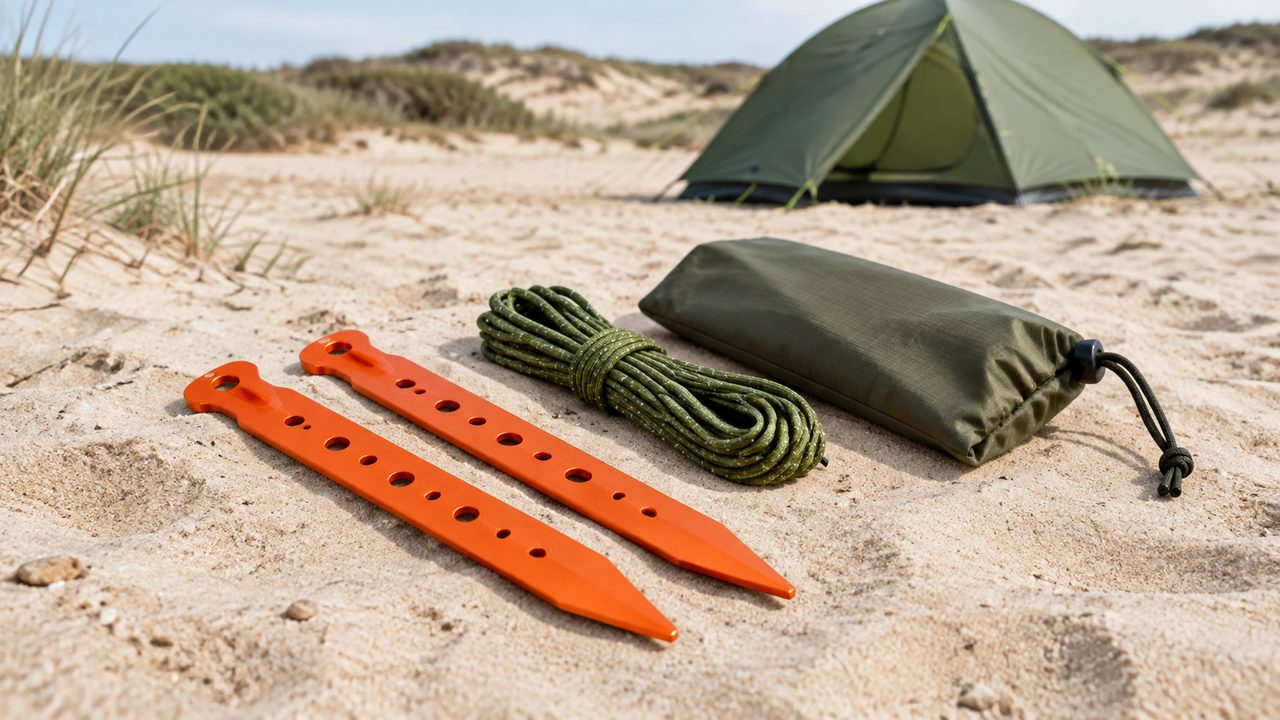
Choose sand anchors around their installation method
People searching for tent stakes for sand often need more than a heavier version of their ordinary peg. A product intended for sand may use a broad profile and may allow more than one installation arrangement. The important information is how that specific anchor is meant to engage the sand and where the line should attach in each arrangement.
MSR's Blizzard and Hilleberg's Snow & Sand Peg are current examples of products whose manufacturers describe both upright use and a buried configuration. They illustrate why instructions belong with the accessory. A buried anchor involves a different setup and recovery process from driving an ordinary pin into the ground; a photograph of the finished tent may hide that difference entirely.
Do not assume all products marketed as sand tent stakes are interchangeable. Compare their dimensions, supplied cord or hardware, permitted attachment points, and instructions for installation and removal. Check whether the listed weight includes the accessories needed for the intended method. A peg that looks attractive in isolation may require additional items before it becomes a complete usable arrangement.
At the campsite, consider the entire pitch and the forecast, not only whether an anchor initially feels secure. Keep anchors and lines clear of routes used by other people, follow local restrictions, and recover every component at departure. If the available ground and approved setup cannot provide a dependable pitch, moving or abandoning the setup is more useful than adding unsupported claims about a “stormproof” stake.
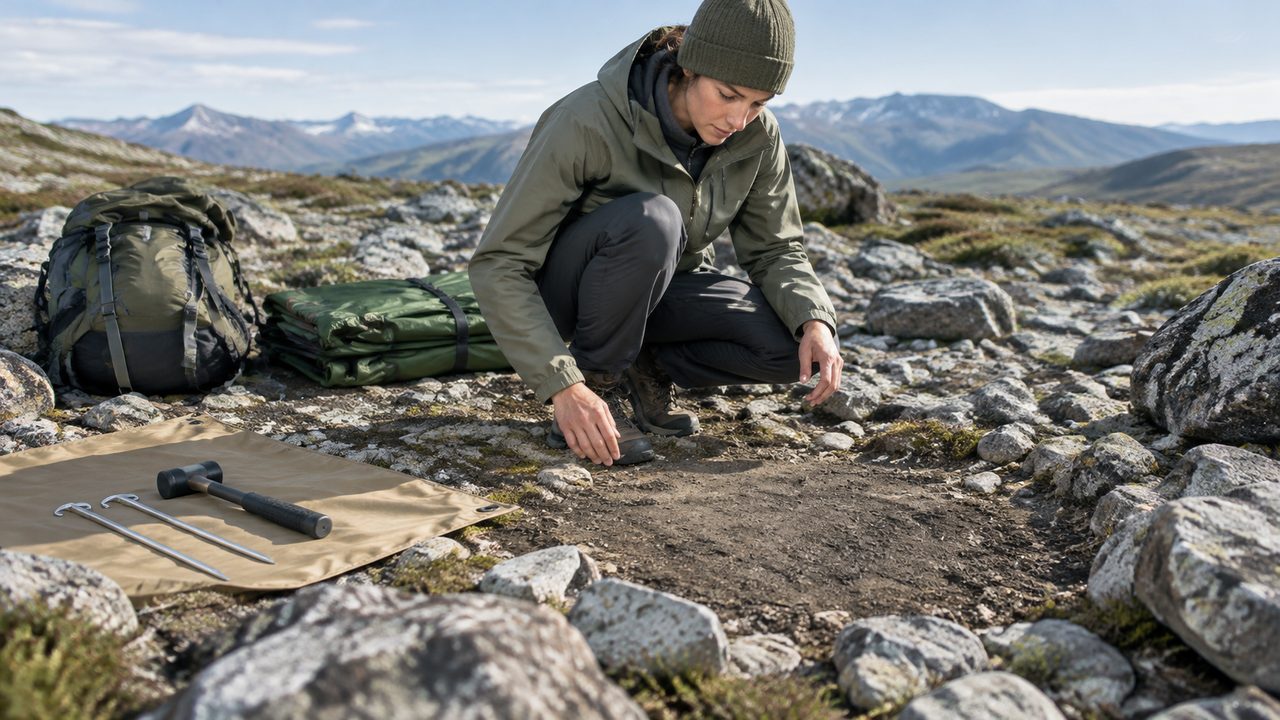
Hard ground and rocky ground are different buying problems
Firm soil that accepts an appropriately designed peg is different from a thin soil layer lying over rock. In the first case, a suitable stake and installation tool may be the relevant purchase. In the second, the required depth may be impossible at that location. A stronger peg does not create additional soil above an underlying slab.
When evaluating tent stakes for rocky ground, ask what the seller means by “rocky.” Does the claim concern firm soil with scattered stones, or does it suggest use where a normal stake cannot enter at all? Those situations should not share an unexplained label. Request a description of the intended conditions and a clear statement of what the product does not address.
If insertion stops unexpectedly, avoid treating harder impacts as the default solution. Reassess the location and follow the manufacturer's guidance for the peg and tool. Check for bending, cracks, damaged heads, and roughened attachment points before continuing. A peg that remains mostly exposed may also create a trip hazard and an unsuitable connection, even if it appears firmly jammed.
Camping platforms, paved areas, and exposed rock may require a different approved arrangement or a different campsite. Do not infer an equivalent anchor from an improvised rock pile, a convenient railing, or a partly inserted stake. Ask the campsite operator what is permitted, and check the shelter manufacturer's instructions. Keep these decisions separate from the ordinary purchase of replacement pegs.
Use published specifications to compare scope, not to invent a ranking
The following current manufacturer examples show how intended ground, dimensions, weight, and package quantity can differ. They are reference points for a buying comparison, not results from our own pull-out test. Prices and availability are deliberately excluded because the useful decision here is what each specification describes and what still needs to be checked.
| Manufacturer example | Published intended use or design | Published size and single-stake weight | Buying question |
|---|---|---|---|
| MSR Groundhog | Y-beam aluminum design described for a range of soil conditions. | 19 cm; 13.95 g; six per pack. | Does the general-purpose set cover the tent's required attachment points? |
| MSR Cyclone | Spiral design intended for softer soil. | 24 cm; 36 g; four per pack. | Which ground conditions justify carrying this alternative? |
| MSR Blizzard | Broad design for sand and snow, including a buried option. | 24 cm; 27 g; four per pack. | Are the installation and recovery arrangements understood? |
| Hilleberg X-Peg | Robust peg intended for hard ground. | 30 cm; 68 g. | Can the expected ground accept the recommended installation? |
| Hilleberg Snow & Sand Peg | Broad peg suitable for upright or buried use. | 31 × 3 cm; 61 g. | What supplied cord and fittings belong in the complete comparison? |
Keep the unit of comparison consistent. A four-piece pack and a six-piece pack are not equivalent kit quantities. A stated single-stake weight should not be compared with another seller's complete set weight. Where a page leaves the basis unclear, obtain clarification before building a specification sheet or presenting a weight advantage to customers.
Installation belongs to the complete tent system
A guide to how to stake a tent should begin with the instructions for the actual shelter. Stakes work with its attachment points, guy lines, adjusters, poles, and pitched shape. The required layout can change between models and pitching modes. Our guide to tent architecture and performance explains why the shelter's structure matters alongside individual components.
Do not apply one installation angle to every peg and every ground condition. Product instructions may specify an orientation for a particular profile or connection. Big Agnes, for example, provides specific setup guidance for its Dirt Dagger design and warns against driving stakes by stepping on them. Use the appropriate tool and method rather than converting a single illustration into a universal rule.
During a practice pitch, check whether the line remains seated as the shelter reaches its intended shape. Confirm that adjusters are usable and that required openings, doors, and vestibules work normally. A distorted pitch can create a different set of problems from an unsuitable stake. Adjusting one component without checking the rest of the tent can make the cause harder to identify.
Practicing how to use tent stakes also reveals what must be available first in wet weather. Stakes, lines, and any installation tool should be accessible in the sequence your shelter requires. Our rain-pitching guide connects that preparation with keeping the sleeping area protected during assembly. An appropriate accessory provides little benefit if it is buried at the bottom of a wet pack when needed.
Build a kit from the required attachment points
A useful tent stake kit starts with the manufacturer's pitching instructions and an inventory. Count the pieces required for the intended configuration, including the guy points you are expected to use. Then identify which ground conditions the standard set addresses. Do not assume the number in a retail pack equals the number needed for your complete pitch.
A mixed set may be practical when a trip includes different expected surfaces, but assign each piece a purpose. Otherwise, “carry a few extras” becomes an unexamined collection of incompatible or unnecessary hardware. Separate ordinary replacements from alternatives that require different instructions. Include the relevant lines, fittings, and tool in the packing decision, and keep them identifiable when the bag is emptied.
The same logic applies to ultralight tent stakes. Compare the carried kit needed for the trip, not just the lightest individual peg in a catalog. A lower unit weight may be attractive, but a comparison should account for quantities and any additional parts. Do not claim that a lighter complete set is less capable without evidence, or that a heavier one automatically supplies a safety margin.
Consider handling as well as the scale reading. Can the user locate the pegs in poor light, grip the retrieval feature, and count the set efficiently? Does the storage pouch protect the tent fabric from points and dirty hardware? These details affect everyday usability and return-condition checks. They are especially useful when several people will share the same rental equipment.
Compare a familiar campsite with an uncertain route
Consider two illustrative buying situations. In the first, a rental operator repeatedly supplies the same tent for a managed campsite with known ground and established pitching guidance. The operator can identify a suitable standard set, record the approved setup, and keep matching spares. The main purchasing questions concern consistency, complete quantities, clear instructions, and replacement availability. A large collection of specialist alternatives may add sorting work without serving that particular package.
In the second situation, a customer plans a route across several campsites whose ground conditions differ. The decision begins with better information about those sites: available pitching areas, restrictions, and the surfaces likely to be encountered. The buyer can then decide whether an alternative set is justified and what it adds to the carried kit. Uncertainty should prompt planning; it should not become a claim that one unusually large stake will solve every possible location.
These situations can lead to different sensible purchases even when both users own the same tent. The first may prioritize a repeatable, easily checked bundle. The second may prioritize a small, clearly understood selection of compatible alternatives. Neither decision can be settled by the headline price or material alone. The intended use supplies the reason for each component in the bag.
For a sales team, put that distinction into the conversation before recommending an upgrade. Ask whether the customer is replacing missing pieces, addressing a specific ground problem, or preparing for a different kind of trip. Each answer calls for different information. It also avoids presenting an accessory as a cure for a shelter whose design or intended use does not match the trip.
Inspect samples before ordering a retail or rental batch
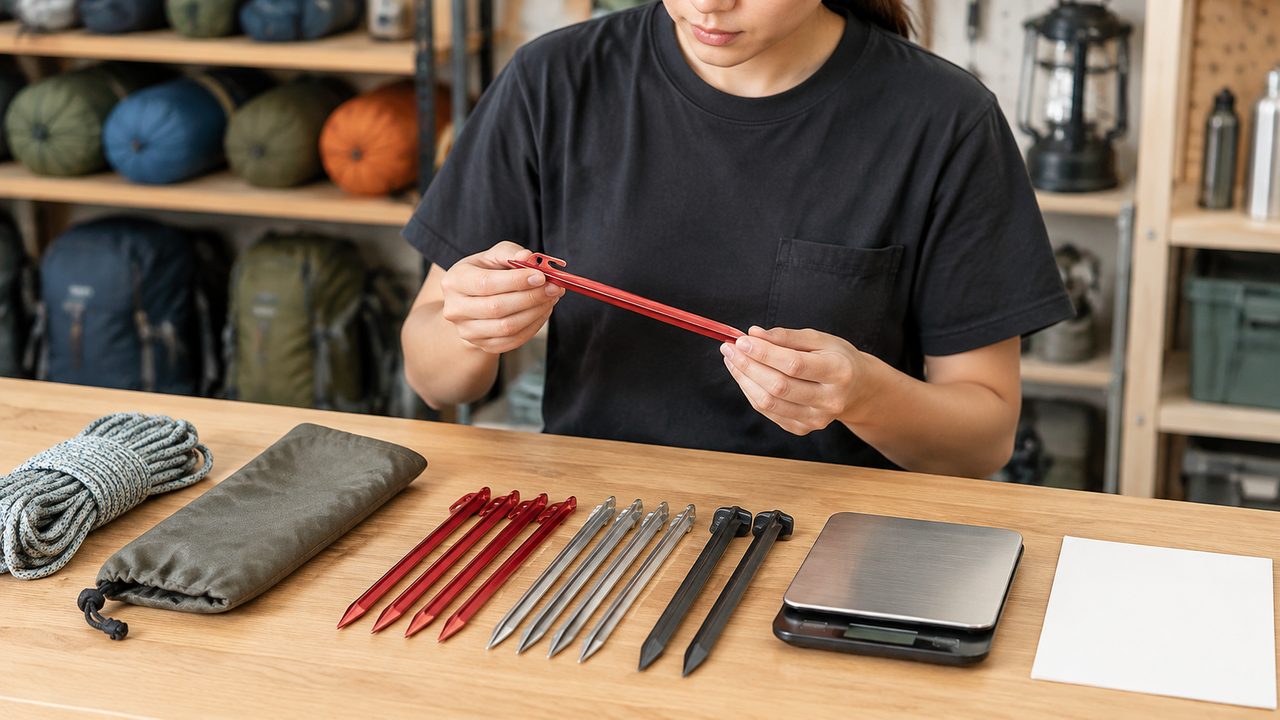
A supplier's sample should arrive with enough information to identify what is being approved. Record the product code, stated material, dimensions, finish, supplied accessories, quantity, and intended conditions. Keep a photograph of the approved set and its packaging. This makes it easier to detect an unexplained change in later deliveries than relying on a broad description such as “premium tent pegs.”
Inspect the head, tip, connection features, and retrieval components. Look for inconsistent shapes, rough edges, loose fittings, and finish defects that could affect handling or cord contact. Check a sample against the tent loops and lines it will be sold with. A stake can match its own drawing yet be inconvenient or incompatible with the proposed bundle.
| Procurement check | Record or demonstration to request | Reason it matters |
|---|---|---|
| Product identity | Model, revision, material declaration, and approved sample photographs. | Connects the delivered item with the purchase specification. |
| Dimensions and mass | Defined measurement basis for one peg and the complete supplied set. | Prevents misleading comparisons between unlike quantities. |
| Attachment compatibility | Check with the intended tent loop, cord, and adjuster arrangement. | Confirms that the accessory works with the proposed bundle. |
| Finish and handling | Inspection of edges, heads, tips, retrieval loops, and protective storage. | Identifies visible defects and handling problems before dispatch. |
| Instructions | Ground-use scope, installation method, removal, and applicable limitations. | Helps users understand the product's intended application. |
| Pack contents | Count sheet covering pegs, cord, fittings, pouch, and any tool. | Reduces incomplete kits and ambiguous product listings. |
| Replacement control | Orderable spare-part code and a process for approving substitutions. | Keeps later repairs consistent with the selected arrangement. |
If a supplier makes a numerical holding-force claim, request the conditions behind it before using it in marketing. The report needs to identify the tested product, installation arrangement, ground preparation, loading method, and result definition. A number separated from those conditions is difficult to interpret. Do not convert a component test directly into an allowable wind speed for a complete tent.
These checks support sample approval and purchasing decisions. They do not constitute an engineering qualification for every campsite. Keep ordinary visual inspection, practical compatibility checks, and any commissioned performance testing clearly identified in your records. That separation makes a product claim easier to defend and a customer complaint easier to investigate.
Make the product listing useful before the customer packs
A listing should state what is included and which situations the manufacturer describes. Show the peg's profile, connection point, and supplied accessories clearly. If one photograph shows a specialty arrangement, explain the parts required for that arrangement. Avoid using a beach image to imply suitability when the listing provides only an ordinary general-purpose set.
There is no single set of best tent stakes for every trip. A useful comparison explains the decision: expected ground, compatible installation, quantity, carried weight, handling, and replacement availability. This gives customers a reason to choose a product without promising universal storm resistance. It also helps sales teams distinguish an appropriate upgrade from an unnecessary accessory.
For bundles, keep the images, selected option, invoice description, and packing list consistent. A customer should not receive a different peg type merely because both versions fit in the same pouch. When a supplier changes a component, compare it with the approved use and compatibility requirements before treating it as an equivalent replacement.
Rental fleets need a return routine as well as a purchase decision
At dispatch, identify the tent, the supplied stake set, and any approved alternatives. A simple inventory card can show the expected quantity and a photograph of each type. Give users the instructions that match those parts. This is more useful than a generic card that shows a different tent or assumes every peg is installed in the same way.
At return, count the pieces and separate damaged or questionable items for review. Clean and dry hardware as appropriate to its care instructions before storage, and check the pouch for dirt or sharp damage. Do not automatically return a badly bent peg to service because it can be pushed back into an approximately straight shape. Follow the manufacturer's replacement guidance.
Keep returned alternatives with their identifying information until the set has been checked. A broad sand peg mixed into an ordinary peg bag can be mistaken for an approved substitution on the next booking. A photograph and a simple location in the storage system make the intended combination visible to staff who did not prepare the previous rental.
Record repeated problems by tent configuration, peg type, and reported ground condition. “Peg failed” is too broad to guide the next purchase. An incomplete kit, unsuitable ground, attachment slipping, insertion damage, and a misplaced component suggest different responses. Better records can improve instructions, spare-part quantities, and the choice of accessories offered with particular rental packages.
Compare the complete cost of a usable set
Unit price is only one part of a procurement comparison. Calculate the price of the required quantity, then add any necessary cords, fittings, tool, and storage. Keep optional items separate so the comparison remains understandable. A low pack price can become less attractive if several packs must be opened to assemble each complete rental kit.
Consider the administrative cost of maintaining too many visually similar variations. Standardizing a suitable general-purpose set and clearly identified alternatives can simplify picking and returns. The objective is a manageable range that covers the intended use, not the fewest possible stock codes regardless of customer needs. Replacement availability also matters when one missing piece would otherwise sideline a complete kit.
The final buying decision should fit in a short explanation: this set suits these expected conditions, connects to this tent as instructed, contains these parts, and has this replacement route. If that explanation requires assumptions the supplier cannot resolve, obtain clarification before ordering. Clear scope is a more useful purchasing outcome than an unsupported claim that one stake can handle everything.
Focused FAQ
Are longer tent stakes always better?
No. Length is useful only as part of a suitable design and installation. The ground must accept the intended arrangement, and the stake must fit the tent's attachment. A long peg stopped by rock may be a poorer choice than relocating the pitch. Compare usable length, geometry, instructions, and the complete kit rather than choosing by length alone.
Can I use ordinary tent pegs on a beach?
Check the tent and peg manufacturer's instructions against the actual sand and expected conditions. Ordinary pegs should not be assumed suitable merely because they enter easily. A sand-specific design or approved buried arrangement may be appropriate, but it still needs correct installation, compatible attachments, and a site where the complete shelter can be pitched securely.
Does titanium guarantee more holding power?
No. The material label does not establish a holding-force result. Shape, dimensions, installation, and ground conditions remain part of the comparison. Evaluate the finished product and its intended application. If a seller provides a numerical performance claim, ask for the test conditions instead of inferring the result from titanium, steel, or aluminum alone.
Should every stake go into the ground at 45 degrees?
Use the instructions for the particular stake and shelter. Designs and attachment arrangements can have specific orientation requirements, so one angle should not be promoted as a universal rule. Also check installation depth, line seating, and the overall pitch. If the required arrangement cannot be achieved at the chosen spot, reconsider the location.
How many spare stakes should I carry?
Begin with the number required for the intended tent configuration, then decide which replacements or ground-specific alternatives the trip justifies. The answer depends on the route, product instructions, and what a missing or damaged component would mean for your setup. Keep the inventory explicit rather than treating a standard retail pack size as the correct quantity.
Can a stronger stake make a tent safe in any wind?
No. The shelter's fabric, seams, poles, lines, attachment points, pitch, and ground connections work together. Upgrading one component does not establish a new wind rating for the whole tent. Follow the manufacturer's intended-use limits, monitor conditions, and choose a different site or stop using the shelter when a suitable setup cannot be maintained.
Sources
Manufacturer information checked on October 28, 2026. Product examples describe published specifications and intended applications; the selection and procurement framework is editorial analysis.


